If you are searching for ways to record the entire screen and part of the screen and your microphone and webcam, you are in the right page. This article is going to be beneficial for you if you are draining your essential time for finding the best recording software that is both affordable, and full of efficient features and tools.
At this time, when our whole life is shifted on the internet from our career to our personal life, everything is now converted into bits. DemoCreator is the screen recorder for Windows 10 and widely used for video editing that worth trying.
Why You Will Need A Full-screen Recording
Things have changed a lot in the last three years; the things that seem to be abnormal have become the norm now. We had never imagined that we would perform online wedding ceremonies; the concept of an online workspace was so shadowy; online academia and virtual spaces, these things were just theories and imagination those days.
Then the world faced the most significant challenge that unleashed the true potential inside human beings that they can even function entirely on the Internet. But these things are only possible with the best free video capture software that give us the screen recording functionalities.
- The recordings generated from the screen recorder have hundreds of applications. When we talk about screen recording in the office sectors, these recorders help employees record meetings for note-taking purposes and training for future resources.
- We also saw the online-wedding trend on pandemic days, and again in this circumstance, screen recorders came to the rescue. Academic life has been wholly shifted to virtual schools and universities; screen recorders help teachers prepare for online lectures. It also helps students save those recordings instead of writing points on notebooks.
- Gameplay recording became more common during pandemic days as more gamers shifted towards starting their YouTube and gaming careers parallel. Social media content creators also heavily use sound screen recorders to make their best social media content. And there are more use cases for screen recorders.
Introducing Wondershare DemoCreator
Editing With DemoCreator
The application is developed by Wondershare to assist users in functioning appropriately during pandemic days. The application is filled with hundreds of editing and recording tools and features.
- With the DemoCreator video editor, you can edit any video. The application makes users add texts, colours, graphics and sounds to the videos.
- Moreover, one can also add transitional effects, filters, captions, annotations, background music, stickers, geometrical shapes, and animations to the videos.
- DemoCreator also makes users do basic editing like cutting, trimming, drawing, audio editings, etc., to the videos.
- The application makes the export and shares feature more efficient as you can share your content almost on social media platform like YouTube.
Recording With DemoCreator
Not only editing, but you can also record screens with DemoCreator; the application is so advanced that it applies machine learning models to its screen recording. The latest feature of the application’s recorder is Virtual Human, which makes your avatar and converts all your recordings into an animated format.
- The application also allows users to record the entire screen or a part of it; you can record your screen, microphone, and webcam, at the same time and separately.
- DemoCreator is a useful for gamers as the softwares includes a separate tab called Record Game that allows gamers to record gameplays with multiple features.
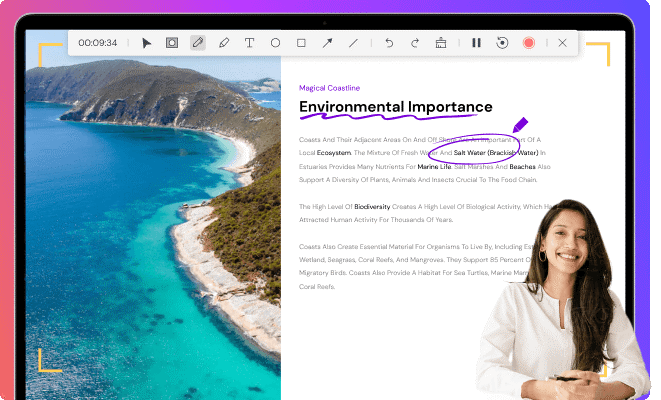
- You can also remove background from the webcam recordings, turn yourself into an animated avatar, edit your audio, and a lot more to further groom your screen recordings. The application also allows you to write or draw on the screen while recording.
How To Record Full Screen Or Part Of The Screen With DemoCreator
Recording with DemoCreator is super easy as it is just a matter of a few clicks, and your work is done. All you will do is download and install the application. Launch the application by double-clicking on the icon after going through all the standard installation processes.
Full-screen Recording With DemoCreator
After you have launched the application, DemoCreator will prompt you to select from the multiple recording and editing options.
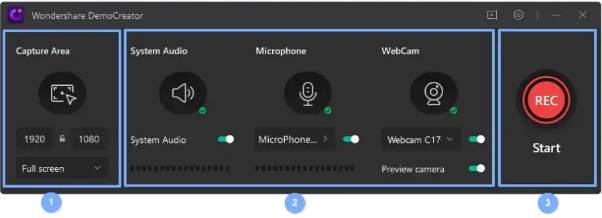
After clicking on the option, the application will make you set the audio, webcam, and screen resolution settings. After giving all the settings, you can click on the red start button to start your recording.
DemoCreator also makes you add cursor effects on your recordings; since you would start the recording, a taskbar will appear on the screen from which you can select multiple cursors and drawing effects along with pause and stop recording options.
Custom Size Screen Recording With DemoCreator
Now comes the ‘part of screen’ recording. The process is the same; you will click on the Screen+Webcam button and then give the settings, on the settings bar, specifically on the Capture Area option, give the screen size you want to record, and click on the red button to start recording.
How To Schedule Recording With DemoCreator
DemoCreator is more efficient than other recording applications. With DemoCreator, you can also schedule your recordings for ease and productivity.
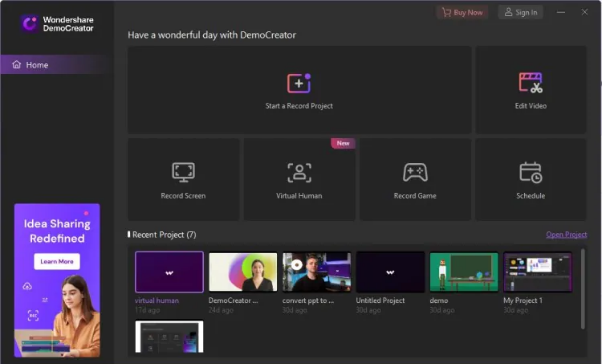
DemoCreator cares about its users and customers, and so it launched this convenient feature called Schedule Recording. After launching the application, right after installing it, click on the Schedule tab, and then provide the required date and time to schedule your meetings or game!
How To Record Full Screen With PowerPoint Or OBS Studio
Now, in this and upcoming sections, we will discuss how one can record their screens with PowerPoint and OBS Studio.
How To Record Full Screen With PowerPoint
Let us take off with the PowerPoint. Microsoft PowerPoint also lets its users record their screens, but its functionality is considerably restricted. All you have to do is launch the Microsoft PowerPoint application and open the slide that you want to record.
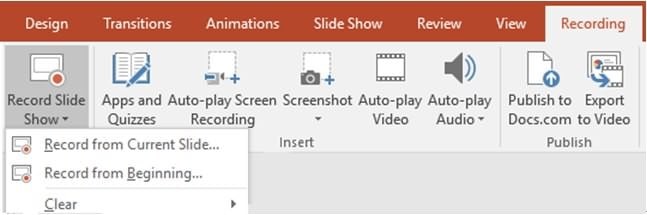
Select Screen Recording on the Insert tab of the ribbon. Pick Select Area on the Control Dock. Select the cross-haired cursor and drag to determine the screen area you want to record. The lowest size area you can record is 64×64 pixels.
Now, you can select Record, Pause, and stop when needed. After stopping the recording, your video will be added to the slide; right-click on the video frame, and select Save Media As.
How To Record Full Screen With OBS Studio
OBS Studio is a free and open-source project that lets users record screens, webcams, and audios for free. As the application is open source, it does not contain many features compared to other applications. You will start by downloading the application.
After downloading, launch it by double-clicking the OBS icon. OBS studio always adds the scene before recording, but click on the plus(+) icon inside the Scenes box from the bottom-left corner of the screen.
Click the plus(+) at the bottom of the panel by navigating to the Sources box right next to Scenes. From the options menu, Select the Display Capture.
Click on OK, and click Settings from the bottom-right corner of the screen. Click Output from the sidebar on the left-hand side. Choose the destination path of your recording file under Recording Path.
Now, click the blue Start Recording button at the lower-right corner of the screen.
How To Add Some Effect And Export Video With DemoCreator
Let us do some editing with DemoCreator for your learning. You will start by starting the application and then clicking on the Edit Video option. Under the File tab, click on Import Media Files to upload all your videos to the application.
From the most left taskbar of the screen, where all your media files are uploaded, you can right-click on them to choose to Add to timeline at playhead. After your files get put on the timeline, you can start editing them by adding effects, captions, annotations, music, etc., from the same left taskbar of the screen.
You can also do basic editing by right-clicking on the frames on the timeline.
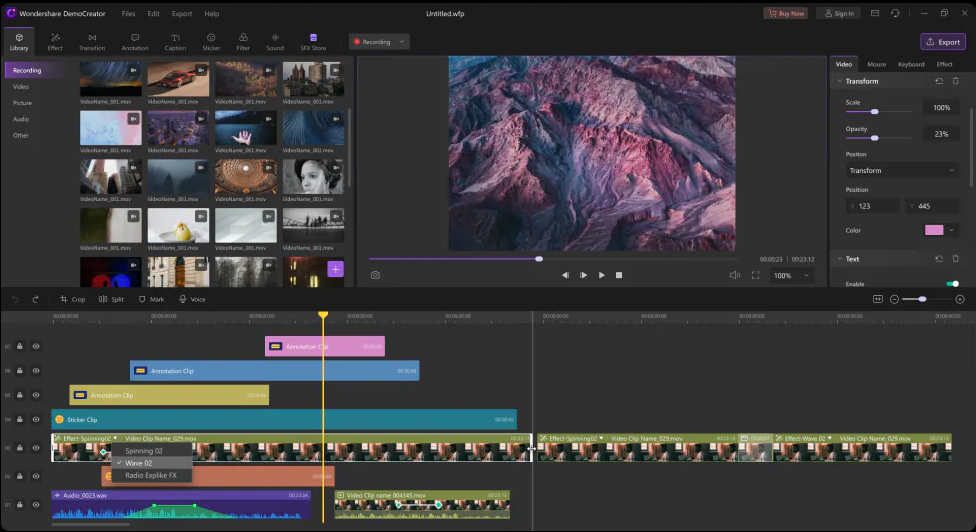
To share and export your files, click on the Export tab. Give the settings and export and share according to your desires.


![TamilRockers Proxy 11 Mirror-Sites [Updated 2022] & How to Unblock It](https://www.techsplashers.com/wp-content/uploads/2022/01/TamilRockers-Proxy-11-Mirror-Sites-Updated-2022-How-to-Unblock-It.jpg)
Leave a Reply